It’s 3 p.m. on a Thursday, and my phone rings—it’s my client Maria, a candle maker from Tampa, panicking. She’d shipped 500 units of her best-selling lavender candles to Amazon’s FBA warehouse in Ontario, California, only to get an email saying the entire shipment was rejected. The culprit? She’d printed the FBA labels upside down, and the warehouse scanner couldn’t read them. To make it worse, she’d used an old address from a discontinued FBA facility instead of the one Amazon assigned in her shipment plan. Now her candles were sitting in a carrier’s holding facility, her Prime launch date was in 10 days, and she had no idea how to fix it. I’ve seen this exact scenario play out hundreds of times—sellers spend weeks prepping inventory, only to get derailed by silly label or address mistakes that could have been fixed in hours. After 6 years of helping Amazon sellers rescue rejected FBA shipments (and avoid the mistakes in the first place), I’m breaking down exactly how to fix label errors, address mix-ups, and other common FBA import disasters—with real stories, step-by-step solutions, and zero fluff. Because the last thing you need is your inventory stuck in limbo while your competitors steal your sales.
First, let’s get one thing straight: Amazon FBA has zero tolerance for label and address errors. Their warehouses process millions of units a day, and they don’t have time to manually sort through mislabeled boxes or track down shipments sent to the wrong address. Rejected shipments don’t just cause delays—they cost money. Amazon charges a $100+ rejection fee per shipment, plus you’re on the hook for carrier storage fees (usually $5-$10 per day per pallet) while you fix the issue. And if you don’t resolve it within 14 days, the carrier might return the shipment to you (at your cost) or even dispose of it. I had a client in Atlanta who ignored an address error notification—his 200 units of pet toys were returned to China, costing him $800 in shipping fees and a 3-month delay in launching his product. Don’t be that seller. The key to fixing FBA import errors is acting fast, knowing who to contact, and having the right documentation ready.
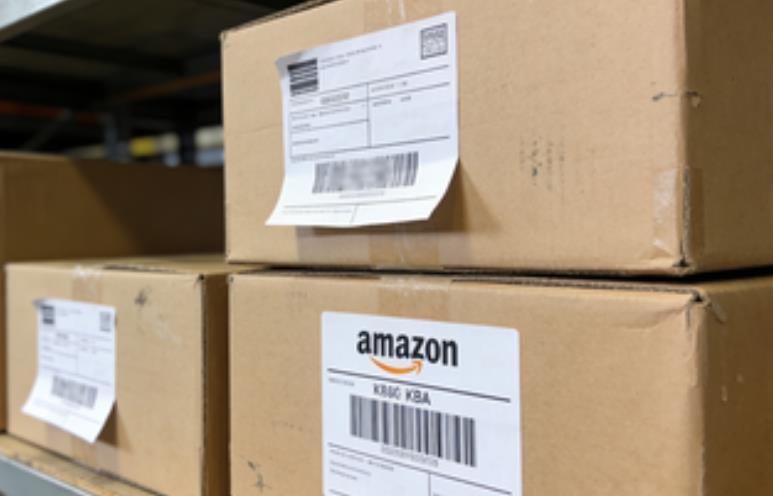
Let’s start with the most common issue: label errors. FBA labels are more than just stickers—they’re Amazon’s way of tracking your inventory from the moment it leaves your warehouse to the second it’s picked by a customer. The most frequent label mistakes I see are: printing labels too small (less than 2×3 inches), using low-quality paper that smudges, overlapping labels, missing barcodes, or printing the wrong ASIN (Amazon Standard Identification Number) on the box. Take my client Jake, who sells hiking gear out of Denver. He’d just launched a new line of water bottles and printed 1,000 FBA labels—but he accidentally used the ASIN for his old water bottle model. When the shipment arrived at Amazon’s warehouse in Phoenix, the scanners couldn’t match the labels to his shipment plan, and the entire batch was rejected. Jake panicked—he’d invested $5,000 in inventory and his launch was scheduled for the following week. Here’s how we fixed it: First, he logged into his Amazon Seller Central account, went to the “Shipments” tab, and found the rejected shipment. He clicked “Contact Support” and selected “Shipment Rejected – Label Error” from the dropdown menu. He included photos of the mislabeled boxes, the correct ASIN, and a request to re-label the inventory at the warehouse. Amazon got back to him within 24 hours and agreed to re-label the boxes for a fee of $0.50 per unit (total $500). The shipment was processed 3 days later, and he launched on time. The lesson? Don’t try to re-label boxes yourself if they’re already at the warehouse—Amazon’s in-house re-labeling service is fast and affordable, and it avoids the risk of further errors.
Another common label mistake: missing or incorrect “Do Not Break Down” labels. If you’re shipping multiple units in a master carton (e.g., 10 individual boxes of candles inside a larger box), you need to put a “Do Not Break Down” label on the master carton—otherwise, Amazon might open it and lose track of your inventory. I had a client in Miami who sells skincare products—she shipped 300 units in 10 master cartons but forgot to add the labels. Amazon opened all the cartons, and 20 units went missing (never to be found). She had to file a claim with Amazon’s FBA Inventory Reimbursement team, which took 6 weeks to process, and she lost $300 in inventory. To fix this error after the fact, she submitted a claim with photos of the original shipment plan (showing the master carton quantities), the carrier’s delivery confirmation, and a list of the missing units. Amazon reimbursed her for the lost inventory, but it was a hassle she could have avoided with a few extra labels. Pro tip: Always print extra FBA labels and “Do Not Break Down” stickers—you never know when you’ll need them, and they cost pennies to produce.
Now, let’s tackle address errors—the second biggest cause of FBA shipment rejections. Amazon assigns a specific FBA warehouse address to each shipment based on your product type, weight, and destination. The most common address mistakes are: using an old warehouse address (Amazon closes and opens facilities regularly), typing the address incorrectly (e.g., “123 Main St” instead of “123 Main Ave”), or shipping to a warehouse in the wrong region (e.g., sending a shipment destined for the East Coast to a West Coast warehouse). My client Sarah, who sells organic snacks from Portland, made the latter mistake. She’d created a shipment plan for Amazon’s warehouse in Robbinsville, New Jersey, but accidentally shipped the 5 pallets of snacks to Amazon’s warehouse in Kent, Washington. When the carrier arrived in Kent, the warehouse refused to accept the shipment because it wasn’t in their system. Sarah’s first instinct was to call the carrier and ask them to redirect the shipment—but that would have cost $1,200 in rerouting fees and a 5-day delay. Instead, we used Amazon’s “Shipment Rerouting” tool. Here’s how it works: She logged into Seller Central, found the rejected shipment, and clicked “Request Rerouting.” She entered the correct warehouse address, paid a $200 rerouting fee (way cheaper than the carrier’s fee), and Amazon coordinated with the carrier to deliver the shipment to Robbinsville. The whole process took 48 hours, and the shipment was accepted without further issues. The key here is to use Amazon’s internal tools instead of going through the carrier—Amazon has partnerships with major carriers like UPS, FedEx, and DHL, so they can reroute shipments at a fraction of the cost.
Another address error nightmare: shipping to a residential address instead of a commercial FBA warehouse. I had a client in Chicago who sells office supplies—he’d just started selling on Amazon and mixed up the FBA warehouse address with his home address. He shipped 200 boxes of printer paper to his house, but the carrier was supposed to deliver to Amazon’s warehouse in Joliet, Illinois. When he realized his mistake, the boxes were already on their way. He called Amazon Support, explained the error, and asked if he could intercept the shipment. Amazon gave him a unique intercept code, which he provided to the carrier. The carrier redirected the shipment to the correct warehouse, and Amazon waived the rejection fee because it was his first offense. The whole thing cost him $75 in intercept fees, but it was worth it to avoid a 2-week delay. Pro tip: Always double-check the address in your shipment plan before printing the shipping label. Amazon’s address format is specific—make sure you copy it exactly, including the suite number and warehouse code (e.g., “Amazon FBA, 2200 Gateway Blvd, Suite 100, Newark, NJ 07114 – ABE8”).
Let’s talk about what to do if your shipment is already rejected and sitting in a carrier’s holding facility. This is the most stressful scenario, but it’s not hopeless. First, you need to find out where your shipment is. Log into your carrier’s account (UPS, FedEx, etc.) and track the shipment—look for a status like “Held at Facility” or “Rejected by Recipient.” Once you have the facility address and contact information, call the carrier and explain the error. Be prepared to provide your tracking number, the correct FBA address, and a copy of your Amazon shipment plan. I had a client in Dallas who sells fitness equipment—his shipment of 100 dumbbells was rejected because of a label error and held at a UPS facility in Houston. He called UPS, provided the correct FBA label (which he generated in Seller Central), and paid a $50 re-labeling fee. UPS re-labeled the boxes and delivered them to the correct Amazon warehouse 2 days later. Amazon didn’t charge him a rejection fee because he fixed the error within 7 days. The key here is to be polite but persistent—carrier customer service reps are busy, but they’re more likely to help if you have all your information ready.
Documentation is your best friend when fixing FBA import errors. You need to have the following on hand: your Amazon shipment ID, tracking number, photos of the original labels/address, the correct labels/address, and a copy of your purchase order or invoice. I had a client in Seattle who sells tech accessories—his shipment was rejected because Amazon couldn’t verify the ASIN on the labels. He submitted a support ticket with photos of the product, the correct ASIN, and a copy of his invoice from the manufacturer. Amazon verified the information and accepted the shipment within 48 hours. Without that documentation, he would have had to re-ship the entire order, costing him $600 in shipping fees. Pro tip: Save all your shipment documents in a cloud-based folder (like Google Drive or Dropbox) organized by shipment ID. That way, you can access them quickly if you need to submit a support ticket or call Amazon.
Now, let’s dive into prevention—because the best way to fix FBA import errors is to avoid them in the first place. Here are the top tips I give all my clients, based on years of seeing what works (and what doesn’t). First: Use Amazon’s FBA Label Service. Instead of printing labels yourself, let Amazon print and apply them for you. It costs $0.50 per unit, but it eliminates the risk of printing errors. I had a client in Los Angeles who switched to this service after three label-related rejections—she hasn’t had a single error in two years. Second: Double-check your shipment plan before shipping. Amazon will send you a confirmation email with the warehouse address and label requirements—read it carefully. I have a client in Atlanta who sets a 24-hour “cooling off” period after creating a shipment plan—he reviews it the next day with fresh eyes, and he’s caught countless typos and address mistakes. Third: Test your labels before printing hundreds of them. Print one label, scan the barcode with the Amazon Seller App, and make sure it pulls up the correct product. A client in Miami once printed 500 labels with a blurry barcode—he tested one, realized the issue, and reprinted them before shipping, saving himself a rejection. Fourth: Use high-quality label paper and a laser printer. Inkjet printers can smudge, and cheap paper can tear—invest in thermal label paper (it’s waterproof and smudge-proof) and a printer that’s designed for barcode labels. I recommend the Zebra GK420d—it’s affordable ($200-$300) and Amazon-approved.
Let’s walk through a real-world example of how to fix a dual error—label and address mistake. Last month, I helped a startup in Austin that sells eco-friendly kitchenware. They’d shipped 300 units of bamboo cutting boards to the wrong FBA warehouse (they used an old address in Las Vegas instead of the assigned one in Phoenix) and printed the labels with the wrong ASIN. The shipment was rejected and held at a FedEx facility in Las Vegas. Here’s how we fixed it step by step: First, the seller logged into Seller Central, canceled the original shipment plan, and created a new one with the correct Phoenix warehouse address. They generated new labels with the correct ASIN and saved them as a PDF. Next, they called FedEx and explained the error—they provided the tracking number, the new labels, and a copy of the new shipment plan. FedEx agreed to re-label the boxes and reroute them to Phoenix for a fee of $150. Then, the seller submitted a support ticket to Amazon, explaining the error, providing the new shipment ID, and asking for a waiver of the rejection fee. Amazon approved the waiver because it was their first offense. The shipment arrived in Phoenix 3 days later, was accepted by Amazon, and the seller launched their product on time. Total cost to fix the error: $150—way cheaper than re-shipping the entire order ($600) or losing the inventory ($3,000).
What if Amazon refuses to fix your error? It’s rare, but it happens—usually if the error is severe (e.g., counterfeit labels, missing ASINs) or if you’ve had multiple rejections in the past. In that case, you have two options: First, you can have the shipment returned to you, fix the labels/address yourself, and re-ship it. This is costly (you’ll pay return shipping fees plus re-shipping fees), but it’s better than losing the inventory. I had a client in Tampa who had to do this—his shipment of 200 sunglasses was rejected because of counterfeit labels. He had the shipment returned to his warehouse, printed new authentic labels, and re-shipped it—costing him $400 in fees, but he recovered his $2,000 inventory. Second, you can donate the inventory to charity and claim a tax deduction. Amazon has a program called FBA Donations—if your shipment is rejected and you don’t want to re-ship it, Amazon will donate it to a local charity and send you a tax receipt. This is a good option if the cost of fixing the error is higher than the value of the inventory.
Let’s wrap up with some universal rules I’ve learned the hard way. Rule #1: Act fast. The longer you wait to fix an error, the more expensive it gets. Amazon’s rejection fees increase after 7 days, and carrier storage fees add up quickly. Rule #2: Use Amazon’s tools instead of third-party services. Amazon’s re-labeling, rerouting, and support tools are designed specifically for FBA sellers, and they’re cheaper and faster than going through a carrier or logistics company. Rule #3: Don’t hide mistakes. Be honest with Amazon Support—if you admit you made a label error, they’re more likely to waive fees than if you try to blame the carrier or Amazon. Rule #4: Learn from your mistakes. Keep a spreadsheet of all your FBA shipments, including any errors and how you fixed them. This will help you avoid repeating the same mistakes in the future. I have a client in Chicago who does this—he reviews the spreadsheet every quarter and has reduced his error rate from 20% to 1%.
The bottom line: FBA import errors are inevitable, but they’re not fatal. The best FBA sellers aren’t the ones who never make mistakes—they’re the ones who know how to fix them quickly and efficiently. By acting fast, having the right documentation, and using Amazon’s tools, you can turn a rejected shipment into a minor inconvenience instead of a business-crushing disaster. And by following the prevention tips, you can reduce your error rate to almost zero.
If you’re currently dealing with a rejected FBA shipment, don’t panic. Take a deep breath, gather your documentation, and follow the steps outlined here. If you’re unsure what to do, contact Amazon Support—they’re available 24/7, and most reps are knowledgeable about FBA import errors. And if you’ve had a horror story with FBA rejections, drop a comment below—I’m happy to help you figure out how to fix it or avoid it next time. No jargon, just real advice from someone who’s been there.
Leave a Reply